

Does it ever feel like you spend every day telling your child the same exact thing? Is every morning a replay of the day before: you telling your child the same steps to get out the door and your child acting like they’ve never heard them before? Some children struggle to learn daily routines, but there’s a simple strategy you can use to help make your daily routines go more smoothly. This process works for any daily routine, not just mornings (after school, bedtime, any time of day!!) Keep reading to learn a commonly used strategy for Behavior Buzz families!
Why Use Visual Schedules for Daily Routines?
If you’re struggling with getting your child to comply with a daily routine, creating an easy to make visual schedule can make all the difference, and visual schedules are honestly one of my favorite strategies to use with all kids! There are lots of different ways to use visual schedules, read here for a post on setting up a visual schedule for a full day, but this post will focus on a super easy way to make a visual schedule for a daily routine. Daily routines are the kinds of things you do the same way every single day. Getting ready for school in the morning, getting ready for bed at night, the steps for getting clean in the bathtub. These things are pretty much done the exact same way every single day, so they make for a really easy starting point for visual schedules!
If you feel like your mornings are so hectic you don’t even know how to start building in a daily routine, you may need to start by simplifying your own routine! Check out this post from All Modern Mommy for some great ideas on ways to make mornings go more smoothly, which can help you build a better daily routine for your child and give you the time to prompt your child in the use of the visual schedule you’re about to create!
Once you know what you want your daily routine to look like, you can build this visual schedule in just 3 easy steps:
STEP ONE: Identify the steps in the daily routine
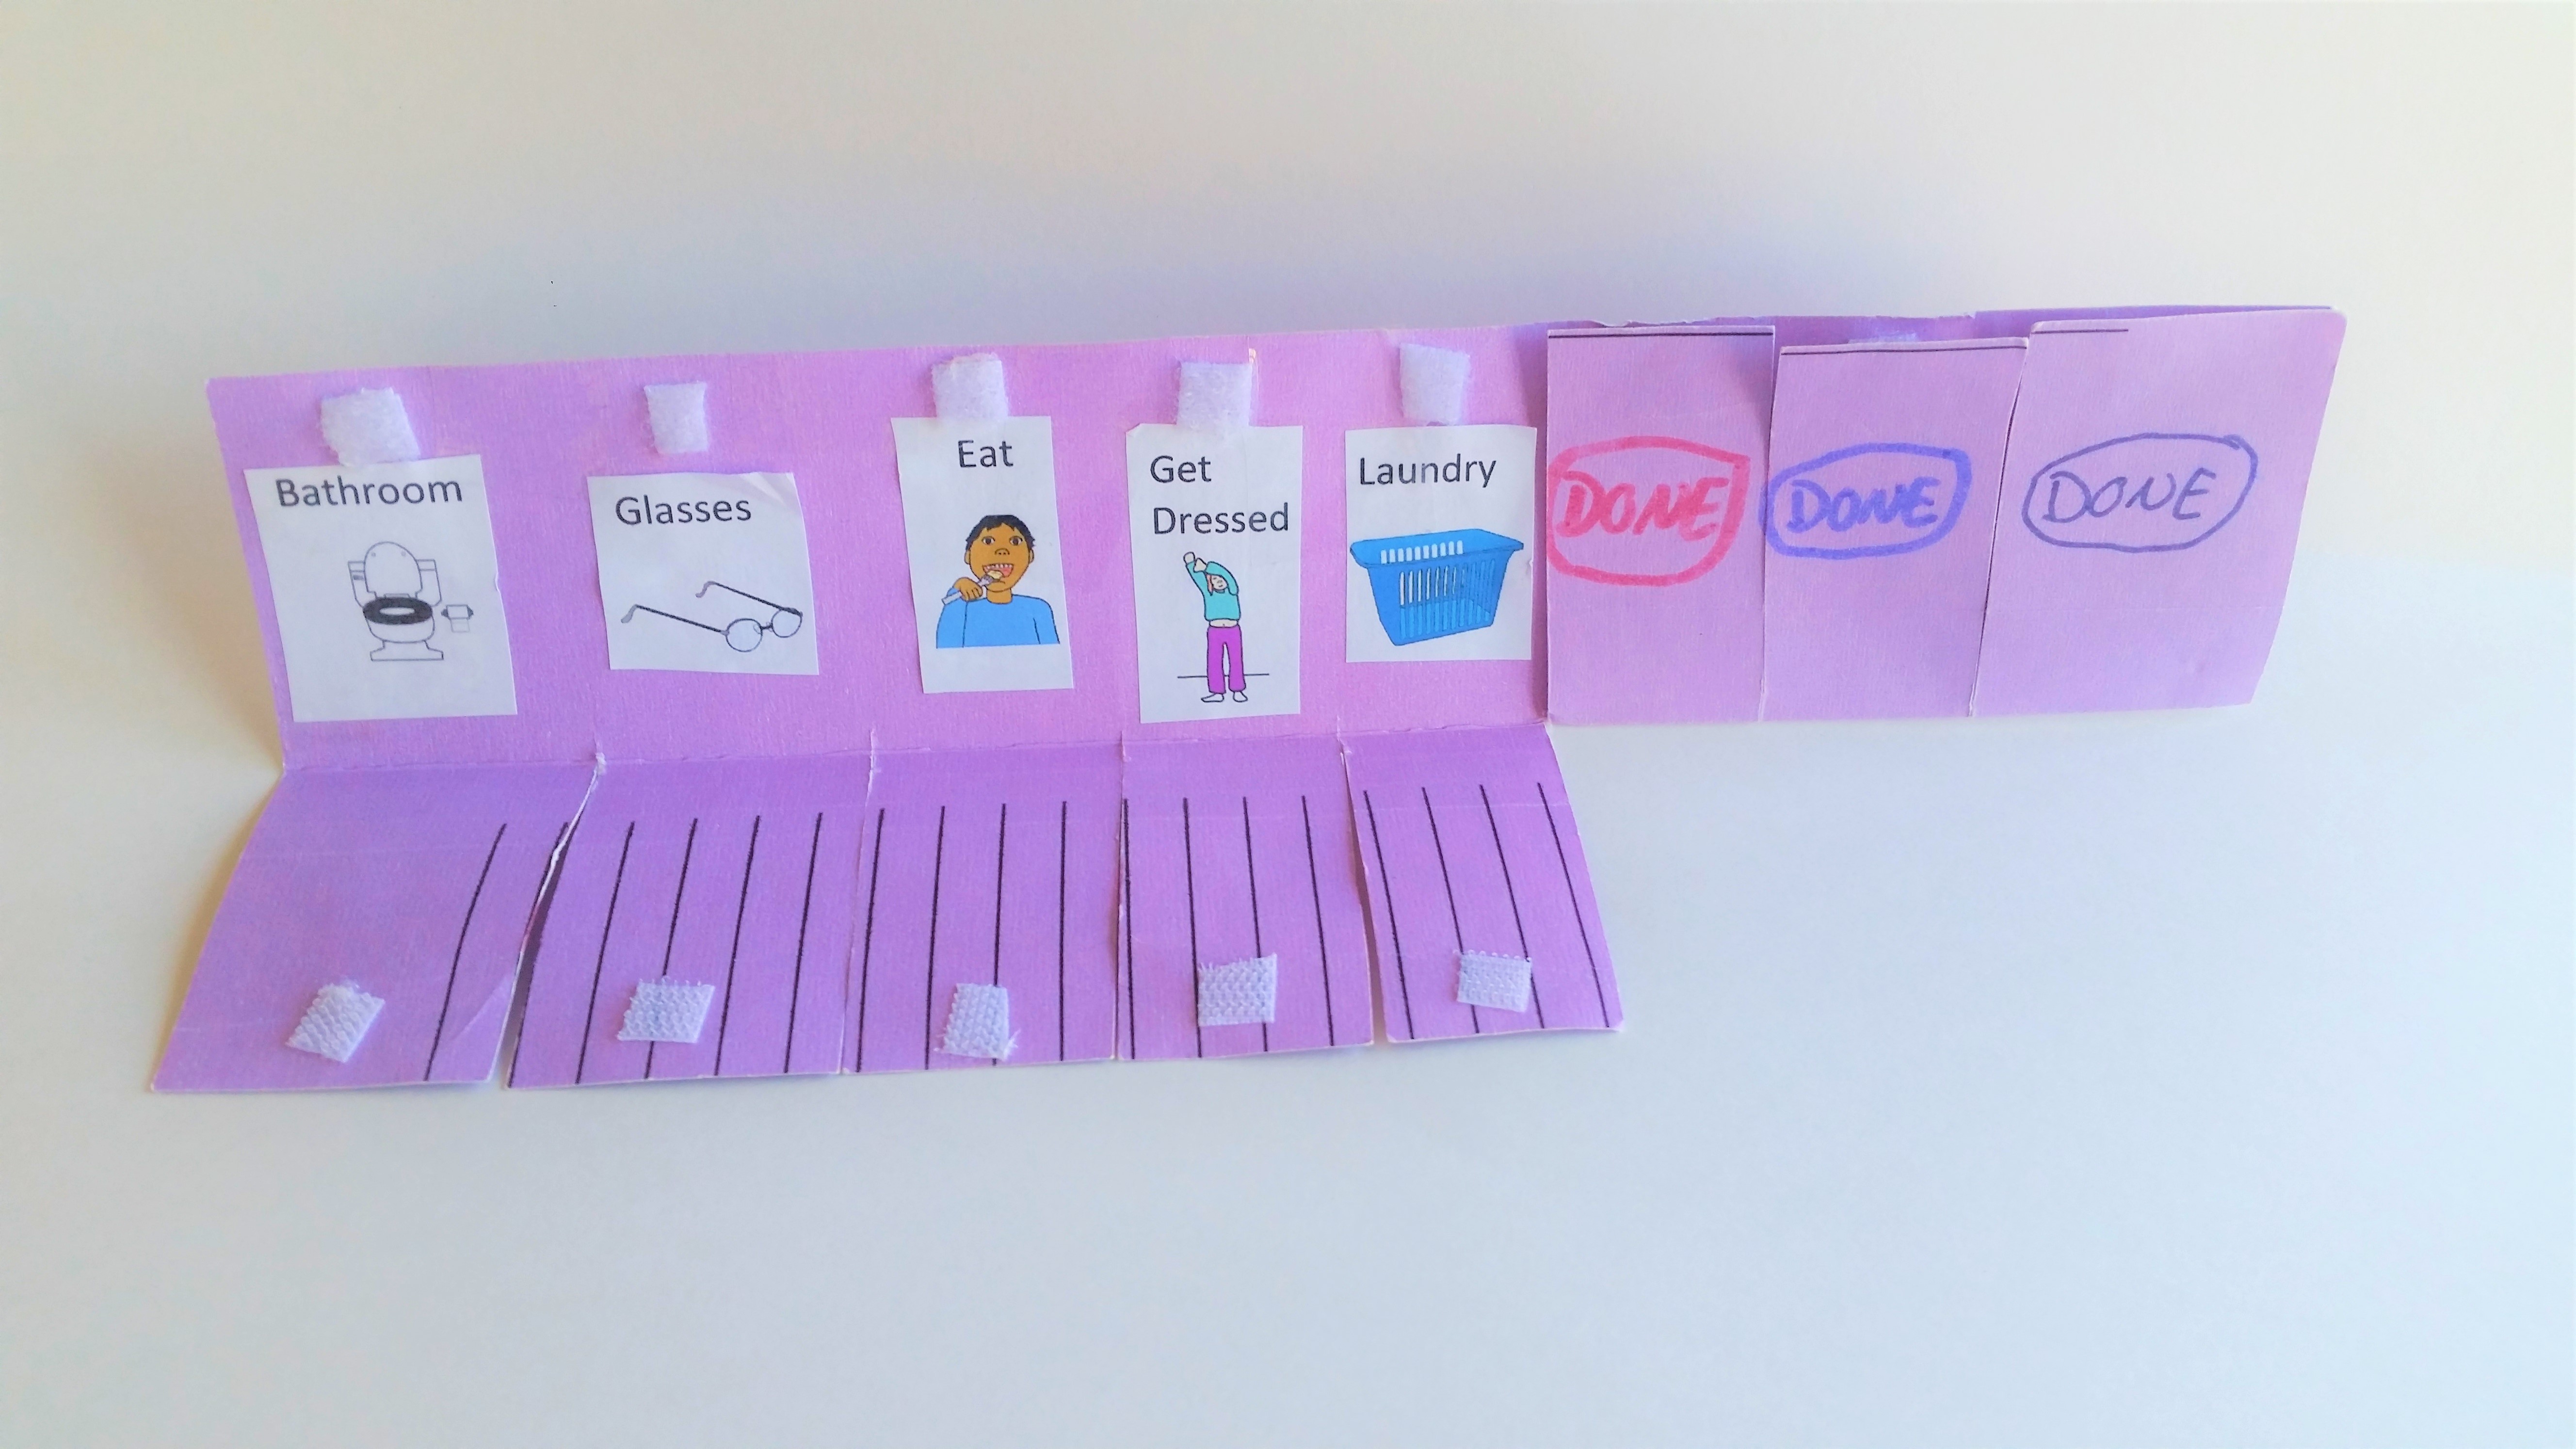
Before you start making a visual schedule, you have to know what’s going to go on it. That means, you need to break down the daily routine into its component steps. The activity on my visual schedule (see pictures) is my child’s morning routine, but you can absolutely use visual schedules for any daily routine.

Start by thinking about each step within that daily routine. For my visual schedule, the steps might include getting dressed, eating breakfast, putting dirty clothes in the laundry basket, brushing teeth, brushing hair, putting on glasses, and putting on socks and shoes.
For an after school routine, it might include putting away your coat, shoes and backpack, emptying your lunchbox, setting homework on the counter, having a snack, and doing homework. The number of steps doesn’t matter, but keep it reasonable. An after school schedule shouldn’t stretch all the way to bedtime. These routine-based schedules usually only cover about an hour or so of time.
Next, make sure you organize the activities into an order that makes the most sense. For my morning routine schedule, I would try to have my child do all the activities upstairs before coming downstairs because it will save us the effort of running back and forth up and down the stairs. That means, my child might get dressed, make the bed, put the laundry in the basket, and brush hair all in row before coming downstairs for breakfast.
You also need to decide whether your child is able to read words consistently or whether to include some pictures. I often use pictures until children are super strong at reading, it just makes the process go more smoothly! Adding pictures also lets children remember what they’re supposed to be doing by glancing at the schedule from across a room.
STEP TWO: Build your Schedule

Once the planning is done, you’re ready to start building! For the schedule pictured in this post, I took a file folder and, keeping it folded over, cut it to about 2.5 inches wide. Remember, you want to have a schedule that opens and closes, so be sure to measure 2.5 inches out from the crease in the folder – when you open it up, it will be 5 inches wide. Be sure to keep it folded when you cut it!
Using clipart on my computer, I then printed and cut out pictures representing each of the steps I’d identified. Don’t feel locked into clipart, though. You can also use photos of your child or even draw your own pictures (if you’re feeling kind of artsy!)
Now it’s time to decide how you want to orient the schedule. There’s no right or wrong – just decide what looks best to you. You can either set it up so the crease is at the top or at the bottom of your schedule (it really won’t matter!). Once you’ve decided, align your pictures accordingly. Glue the pictures to the inside back of the file folder, remembering to leave some space between them.
Next, take scissors and made cuts on the front side of the folder (opposite the pictures you’ve just attached). This step allows you open or close each section of the folder so you can see or hide the picture. Think of it like a lift the flap book from when your children were little!


Personally, I like to use a little Velcro on the both of the inside sides of the folder so that it seals shut when my child pushes the section closed, but it’s not mandatory. I also added the word “done” on the outside, so that the schedule says “done” as my child completes each task and folds it shut. You could also use smiley faces, check marks, or just leave the outside cover blank – whatever you think will make this work best for your child is fine! For some kids, adding pictures of favorite cartoon characters, toys, or interests on the front can make the schedule even more fun!
STEP THREE: Teach the Schedule
Once it’s all built, find a place to hang the schedule. Remember, the schedule should be hung someplace where your child will see it every day. This is especially important during the first few days or weeks, when you’ll likely need to help prompt your child through the schedule. In our home, I hung the schedule in my child’s room because most of the morning routine steps occurred there. I also started those first weeks by making sure all the flaps were opened each morning. I then prompted my child to “check your schedule” after each activity rather than stating exactly what to do throughout the morning.
Although it’s a slight difference, prompting your child to check the schedule instead of saying what to do next helps him or her learn that the schedule is a source of information. Although during the first few days, this may feel like an added step, very quickly your child will begin to learn to just go check the schedule after finishing each task! You want your child to learn to use tools to get through his or her day, rather than rely on you. Although some parents think using a schedule is moving backwards (because they’re adding in a visual support), you’re really teaching your child how to manage without adult prompting. Most adults have to-do lists at work, they don’t ask their boss what to do next after completing every single task. This schedule is the same idea, you’re teaching your child that he or she can keep track of tasks without asking an adult for guidance. You’re helping build independence!
As your child finishes each step, have him or her fold up the flap showing that it is done. Folding the flaps to cover completed tasks makes it easier for your child to know what step is next. As an added bonus, it lets you easily scan the schedule to see how close your child is to finishing the routine.
In our house, after a few months, my child was so independent multiple steps were being completed without any reminders. At that point, we slowly started faded out the use of the schedule, but I kept it hanging up for a few years just for those rough mornings when everything was a struggle. My child is much older now and has internalized the morning routine, but the picture schedule was an absolute necessity for many years. Although our picture schedule is long gone, the independence it taught and the memories of peaceful mornings (rather than daily battles) will stay with my child for many, many years!
One Last Thing to Keep in Mind
Please keep in mind that file folder schedules are a great way to build a schedule for a daily routine that stays the same each day. Not all parts of your day likely follow routines, though. If you need ideas for how to create a schedule for activities that change more often, read my post here about how to create a picture schedule with Velcro pieces that can be rearranged.

2 thoughts on “Learn How to get your Kids Through their Morning (or evening!) Daily Routine without a Battle in (honestly) 3 Easy Steps!”